25 AI Pumpkin Carving Prompts for Stencils and Jack-o'-Lantern Ideas (Copy & Paste 2026)

Written by
Aerin Kim
Copy 25 AI pumpkin carving prompts for printable black and white stencils, etched designs and photoreal jack-o'-lantern ideas, plus bridges, tools, transfer tips and how to keep carved pumpkins fresh.
If you searched for pumpkin carving ideas and ended up with a dozen stencils that look great on screen but collapse the moment you cut them, the problem is almost always the same: the design has floating pieces with nothing holding them in place. A stencil that works on a real pumpkin has to be drawn so that every piece of skin you want to keep stays connected to the rest, and most free printables ignore that rule once the design gets complicated.
AI image generators can make this much easier, because you can describe the exact style you want, ask for pure black and white shapes, and tell the model to keep every white area attached with bridges. They can also produce realistic photos of finished carved pumpkins, which helps you decide what to carve before you waste a pumpkin on a design you do not like. This guide gives you 25 copy-and-paste prompts for both jobs, plus the carving craft that decides whether a printed stencil actually works.
Timing matters this year. Halloween 2026 falls on Saturday, October 31, so the sweet spot for carving is Tuesday, October 27 through Thursday, October 29. A carved pumpkin usually looks good for roughly three to five days in mild weather, and a cut pumpkin left in a warm room goes soft faster than one kept somewhere cool.
TL;DR: How to Use These AI Pumpkin Carving Prompts
- Open Miraflow's AI Image Generator, choose a 3:4 vertical ratio for stencils (it prints well on a US Letter or A4 page) and paste a prompt from the stencil sections.
- For stencils, ask for pure black and white shapes, say that black is cut out and white stays, and always add a line that every white area must connect to the border with bridges. That one sentence is the difference between a stencil that works and one that falls apart.
- For shaded designs, use three flat tones: black for cut-through, gray for shaved (etched) skin and white for untouched skin.
- Print at roughly 6 by 8 inches for a medium pumpkin, tape it on, transfer the lines with a pin tool and cut from the smallest details outward.
- For inspiration images and glowing jack-o'-lantern photos, use the photoreal prompts and keep them as reference or content only. Never expect a photo of a carved pumpkin to double as a stencil.
- Turn your finished pumpkin into content with Text2Shorts or the cinematic video generator.
- This post covers pumpkin carving only. For other Halloween projects see the Halloween YouTube thumbnail prompts, the Halloween party invitation prompts and the Halloween wallpaper prompts.
Why Most Pumpkin Stencils Fail, and the Two Rules That Fix Them
Bridges and Islands: The Rule Behind Every Working Stencil
Carvers call a piece of skin that is completely surrounded by cut-out space an island. If you draw a perfect ring, for example the letter O or the inside of a pupil, the center disc is an island and it will simply drop out when you cut around it. A bridge is a strip of skin you leave in place that connects that island to the rest of the pumpkin, and every island needs at least one.
Stencils made by image models fail this test constantly, because the model draws what looks good on a page and has no idea that paper can hold a floating shape while a pumpkin cannot. That is why every stencil prompt in this guide spells out the rule in plain language: black means cut out, white means skin that stays, and every white area must connect to the outer white border. When a generated stencil still has an island, you can fix it in seconds by drawing a thick white line from the island to the border in any image editor, or by regenerating with a note such as "add two more bridges".
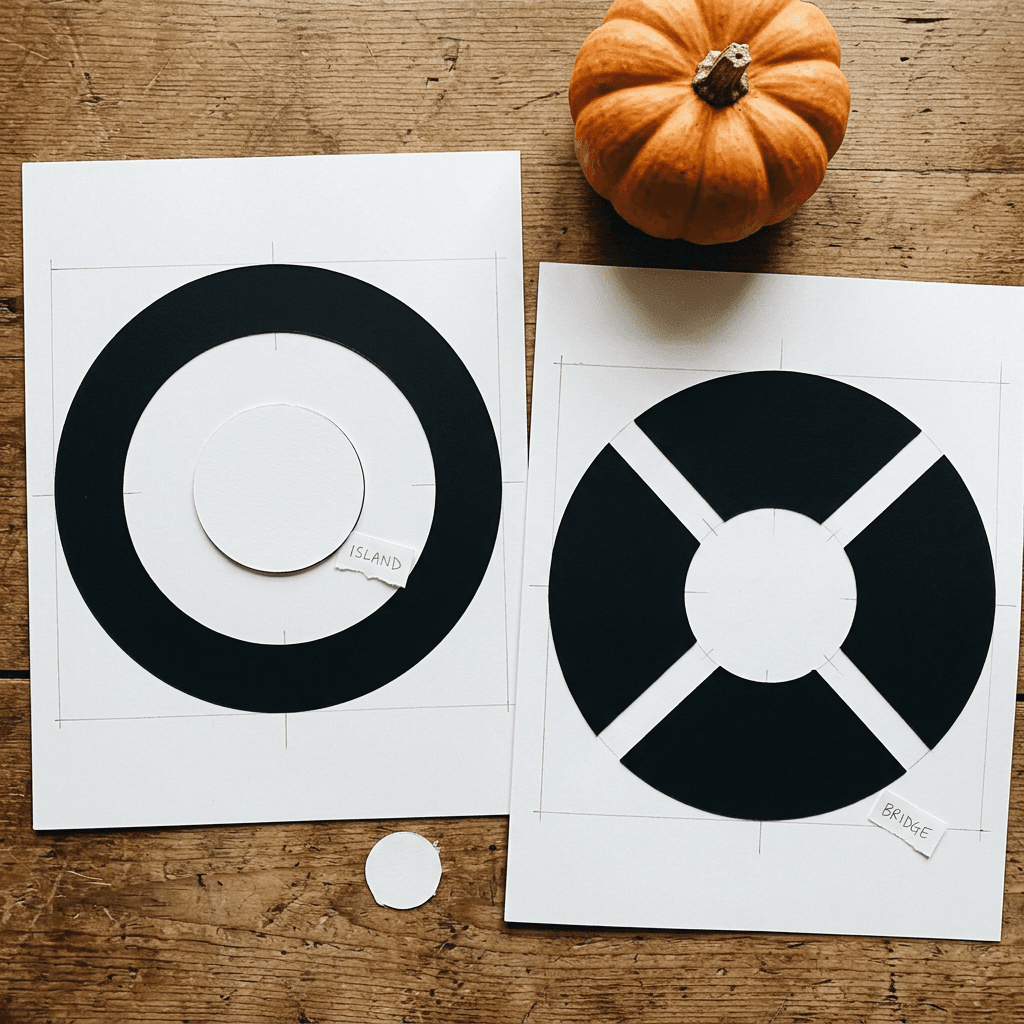
As a size guide, bridges should be about a quarter inch thick at full size on a medium pumpkin, and a thin bridge breaks the moment the wall is thin. Long skinny details, such as whiskers, antennae and thin tails, should be drawn thick or skipped, because they snap while you cut.
Cut-Through, Shaving and Etching: Three Levels of Light
A pumpkin wall is about one to two inches thick, and light only shows up where the wall is cut away or thinned. Cutting all the way through gives you the brightest glow. Shaving, which is also called etching or peeling, removes just the orange skin and a little flesh so that a thinner layer of pumpkin lets a softer amber glow through. Untouched skin stays dark. A design that uses all three levels looks far more three-dimensional than a flat silhouette, which is why shaded owls and wolves look so impressive.
For prompts, this translates into three flat tones: solid black for cut-through, one flat gray for shaved areas and white for untouched skin. Gradients confuse both the model and the carver, because you cannot shave a smooth gradient with a tool, only a few distinct depths. The etched prompts in section 3 use exactly this three-tone system.
Choose a Pumpkin That Suits the Design
Wide, smooth, upright pumpkins carve best. Classic carving varieties such as Howden and similar jack-o'-lantern types have thick walls, a flat enough front and sturdy stems, and they are the safe choice for intricate cut-through work. Smooth white or pale pumpkins are popular for etching and for a modern look, because the pale skin shows shaved areas with strong contrast. Very warty or deeply ribbed pumpkins make a great spooky face but are hard to match to a detailed stencil. Look for a pumpkin that sits flat, has a firm stem, no soft spots and a front surface wide enough for your stencil.
| Pumpkin size | Width of the front | Stencil size to print | Best for |
|---|---|---|---|
| Small (a few pounds) | About 5 to 7 inches | About 4 x 5 inches | Simple ghosts, moons and cats for kids |
| Medium (a typical carving pumpkin) | About 8 to 10 inches | About 6 x 8 inches | Classic faces and most etched designs |
| Large (20 pounds or more) | 12 inches or wider | About 8 x 10 inches or larger | Detailed scenes like the haunted house or wolf |
Tools That Make It Easier
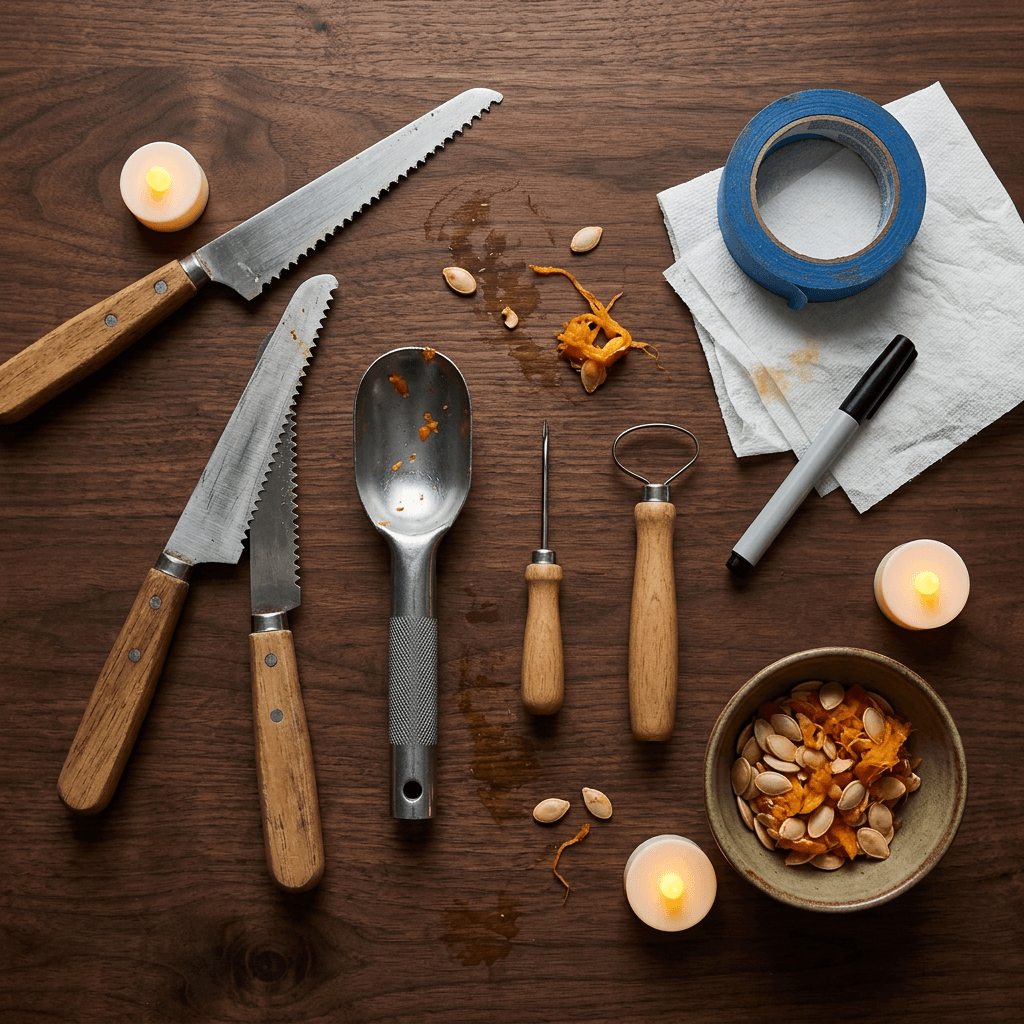
You do not need much, but the right small tools make a big difference to the finished edges.
- A pumpkin saw set with a few short serrated blades, which cut much more cleanly than a kitchen knife.
- A scoop or sturdy metal spoon to clear the inside, and a wide bowl to catch the pulp and seeds.
- A pin tool, pounce wheel or a thick sewing needle to transfer the pattern.
- A loop tool, linoleum cutter or clay tool for etching and shaving the skin.
- Painter's tape, a washable marker and paper towels.
- A small LED candle or battery tea light for the finished glow.
How to Transfer a Stencil Without Tearing It
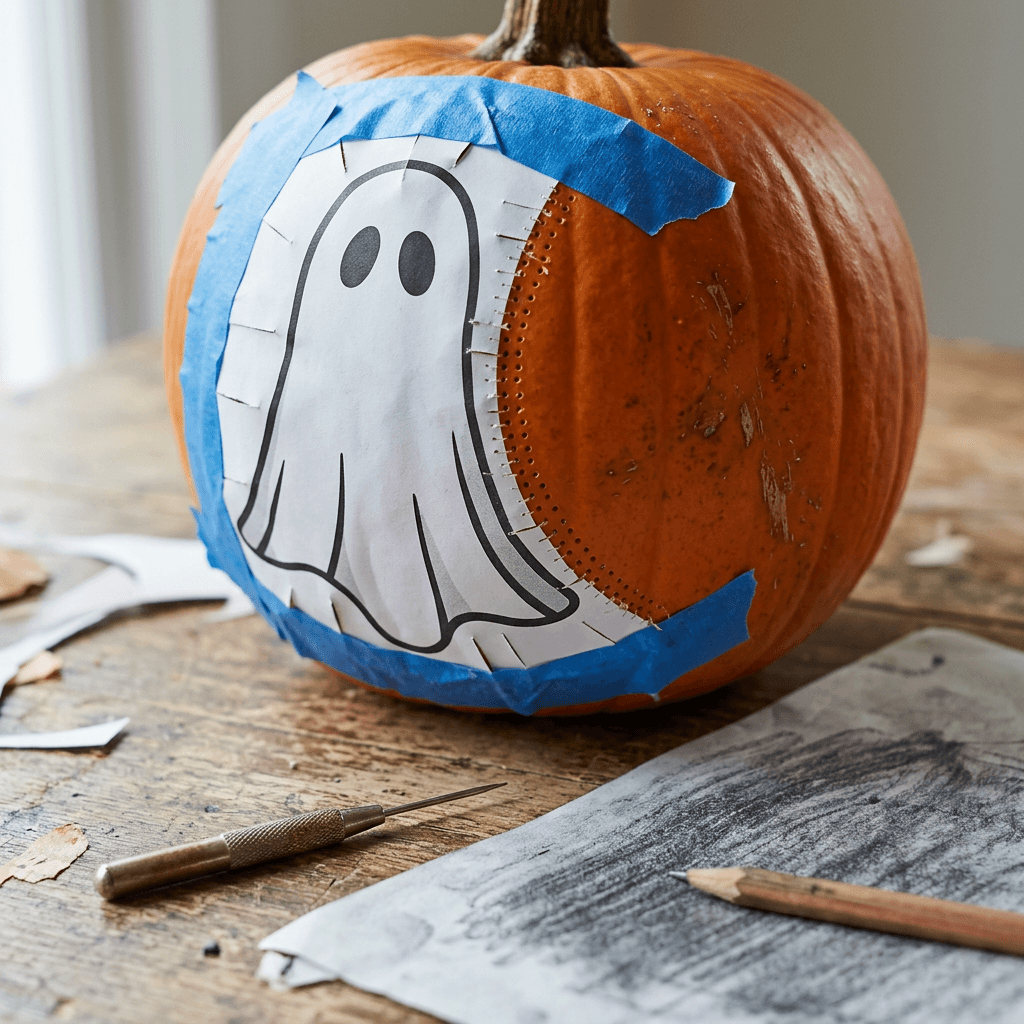
A flat sheet of paper has to wrap around a curved surface, so the stencil wrinkles unless you help it. Trim the paper close to the design, cut small relief slits from the edge toward the design where the paper would buckle, and tape it down on all sides with painter's tape. Then poke holes along every line about an eighth of an inch apart, pushing the pin tool a little way into the skin. Remove the paper, and you have a dotted outline you can follow with the saw.
Another option is graphite transfer. Rub the back of the printed stencil with a soft pencil, tape it graphite side down, and trace over the lines with a pen to leave a faint outline. Graphite works well on pale pumpkins, while dotted holes are easier to see on dark orange skin. Some carvers skip printing altogether and sketch freehand with a marker, but a stencil is much more reliable for detailed shapes.
Cutting Order, Safety and Keeping the Pumpkin Fresh
Cut the smallest details first and the largest shapes last, because the pumpkin is strongest when most of the skin is still connected. Work from the center outward, push the pieces out from the inside instead of pulling them, and saw slowly with short strokes, using the saw as a pencil rather than as a knife. Carving is a job for steady hands and good light, so younger children should draw, scoop and design while an adult cuts.
To keep the finished carving looking fresh, a few simple habits help. Scrape the inside wall thinner (about one inch) on the side you will cut, rub petroleum jelly on the cut edges, and, if a pumpkin starts to wrinkle, a short soak in cold water with a small splash of bleach can firm it up again, though you should rinse and dry it afterward and keep it away from pets and children. Keep the pumpkin cool and out of direct sun, and use an LED light, because real candle flames dry and scorch the inside of the lid and add a fire risk. If you plan a carved display for Halloween night, carve two or three days ahead rather than a week ahead.
1) Easy Beginner Pumpkin Stencils
Beginner stencils use large simple shapes, few pieces and thick bridges, so a first-time carver can finish one in about 30 to 45 minutes. These four prompts also work well for kids who want to pick their own design.
1. Friendly Ghost Stencil
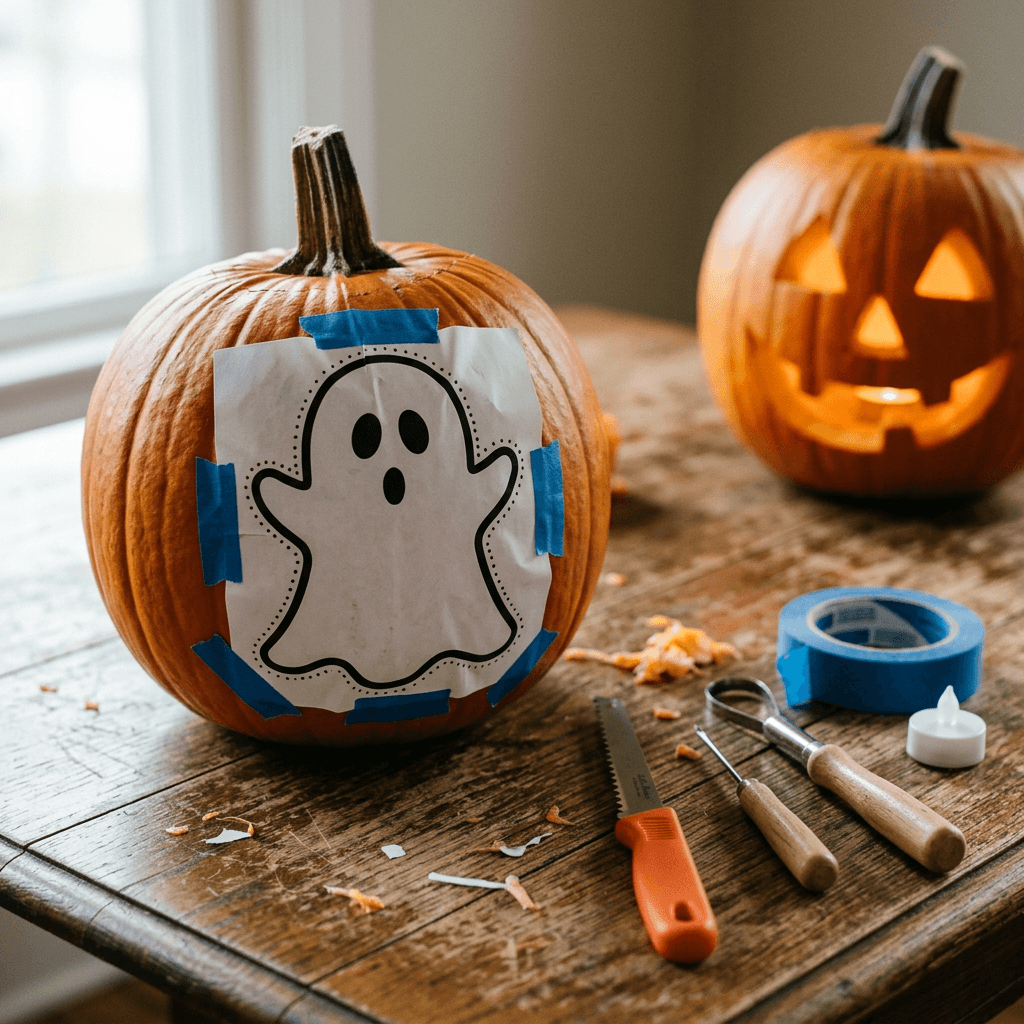
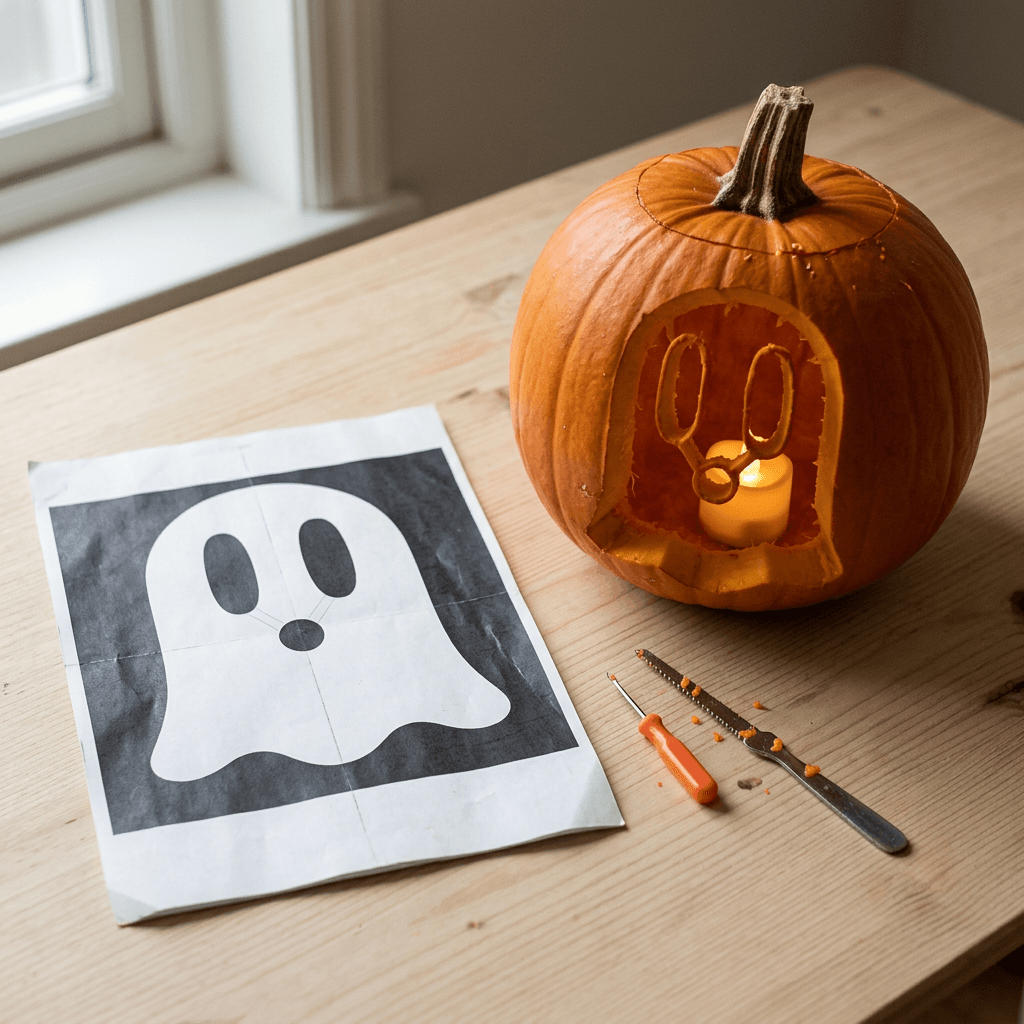
A single rounded ghost is the easiest first carve, because the only cuts are two eyes and a mouth, and the wavy hem is a decoration you can skip entirely. Generate it at 3:4.
A black and white pumpkin carving stencil template printed on a plain white vertical page, showing one large friendly ghost shape with a softly wavy bottom edge, two tall oval eyes and a small round open mouth, all as black cut-out areas inside a thick white outline. Solid black shapes mark the parts that will be cut out and white marks the pumpkin skin that stays, with the white outline of the ghost kept at least half an inch thick and a thin white bridge splitting the mouth from the left eye so nothing can collapse. The design is centered with a wide white margin, sized to wrap onto a medium pumpkin about 6 inches wide and 8 inches tall. Pure solid black and pure white only, no gray, no gradients, no shading, crisp clean vector-like edges, every white area connected to the outer white border by bridges at least as thick as a pencil, no floating white islands, no text, no watermark, no logos.
2. Bat in Flight Stencil
A bat silhouette with chunky wings looks impressive but needs only one continuous cut, and the wing ribs double as built-in bridges. Use 3:4 so the wingspan fills the width of the page.
A black and white pumpkin carving stencil template printed on a plain white vertical page, showing one large bat with outstretched wings seen from the front, the entire bat body and wing membranes as solid black cut-out shapes with three white rib lines running outward through each wing, Solid black shapes mark the parts that will be cut out and white marks the pumpkin skin that stays, with the white rib lines and a white strip between the ears and the head keeping every piece attached to the outer white border. The design is centered with a wide white margin, sized to wrap onto a medium pumpkin about 6 inches wide and 8 inches tall. Pure solid black and pure white only, no gray, no gradients, no shading, crisp clean vector-like edges, every white area connected to the outer white border by bridges at least as thick as a pencil, no floating white islands, no text, no watermark, no logos.
3. Smiling Moon and Three Stars
A crescent moon with a face and three little stars gives you five short cuts and a charming nursery-rhyme look, which is a good pick for kids who want to help. Generate at 3:4.
A black and white pumpkin carving stencil template printed on a plain white vertical page, showing a fat crescent moon with a sleepy closed eye and a small smile cut into its curve, with three chunky five-point stars floating above and beside it, all as black cut-out areas, Solid black shapes mark the parts that will be cut out and white marks the pumpkin skin that stays, with each star kept at least an inch across and the crescent's tips kept thick so the thin ends do not snap. The design is centered with a wide white margin, sized to wrap onto a medium pumpkin about 6 inches wide and 8 inches tall. Pure solid black and pure white only, no gray, no gradients, no shading, crisp clean vector-like edges, every white area connected to the outer white border by bridges at least as thick as a pencil, no floating white islands, no text, no watermark, no logos.
4. Simple Cat Face Stencil
Two pointed ears, two almond eyes, a tiny nose and a few whisker slits turn a round pumpkin into a cat with very little carving. Whiskers are the part to keep short and thick. Generate at 3:4.
A black and white pumpkin carving stencil template printed on a plain white vertical page, showing the front view of a cat's face with two pointed ears, two large almond-shaped eyes with narrow vertical pupils, a small triangle nose, a curved w-shaped mouth and three short thick whisker slits on each side, with the eyes, nose, mouth and whiskers as black cut-out areas Solid black shapes mark the parts that will be cut out and white marks the pumpkin skin that stays, and every whisker slit separated from the next by a generous strip of white. The design is centered with a wide white margin, sized to wrap onto a medium pumpkin about 6 inches wide and 8 inches tall. Pure solid black and pure white only, no gray, no gradients, no shading, crisp clean vector-like edges, every white area connected to the outer white border by bridges at least as thick as a pencil, no floating white islands, no text, no watermark, no logos.
2) Classic Jack-o'-Lantern Faces
The traditional faces still get the most searches in October, and the main craft question is how many teeth you leave standing. These four add personality without changing the basic triangle-and-grin approach, and they pair well with the reference photos in section 6.
5. Classic Triangle Eyes and Zigzag Grin
The traditional jack-o'-lantern is still the most searched face, and the trick is to leave a bridge between the teeth so the grin does not turn into one big hole. Generate at 3:4.
A black and white pumpkin carving stencil template printed on a plain white vertical page, showing a traditional jack-o'-lantern face with two triangle eyes, one triangle nose and a wide curved grin with four square teeth left standing as white blocks, all other face shapes as black cut-out areas, Solid black shapes mark the parts that will be cut out and white marks the pumpkin skin that stays, with each tooth connected to the upper and lower white skin by wide white bridges and the grin broken into two halves by a white strip below the nose. The design is centered with a wide white margin, sized to wrap onto a medium pumpkin about 6 inches wide and 8 inches tall. Pure solid black and pure white only, no gray, no gradients, no shading, crisp clean vector-like edges, every white area connected to the outer white border by bridges at least as thick as a pencil, no floating white islands, no text, no watermark, no logos.
6. Grumpy Brow Face With One Fang
Angled brows and a single crooked fang give a face real personality and take no more time than the classic grin. Generate at 3:4.
A black and white pumpkin carving stencil template printed on a plain white vertical page, showing a grumpy jack-o'-lantern face with two thick slanted eyebrow slashes, two small round eyes underneath, a broad frowning mouth and one long white fang pointing down from the upper lip, all other face shapes as black cut-out areas, Solid black shapes mark the parts that will be cut out and white marks the pumpkin skin that stays, with the fang attached to the upper white skin at its wide base and the eyebrows kept separate from the eyes by a white strip about half an inch thick. The design is centered with a wide white margin, sized to wrap onto a medium pumpkin about 6 inches wide and 8 inches tall. Pure solid black and pure white only, no gray, no gradients, no shading, crisp clean vector-like edges, every white area connected to the outer white border by bridges at least as thick as a pencil, no floating white islands, no text, no watermark, no logos.
7. Surprised Face With Wavy Mouth
Round eyes and a wobbly open mouth read as pure fright from across the street, and circles are easier to cut cleanly with a drill bit or a small round cutter. Generate at 3:4.
A black and white pumpkin carving stencil template printed on a plain white vertical page, showing a startled jack-o'-lantern face with two big circular eyes each containing a small white pupil dot, a tiny triangle nose and a wide wavy open mouth with three round teeth hanging from the top edge, all face shapes as black cut-out areas, Solid black shapes mark the parts that will be cut out and white marks the pumpkin skin that stays, with each pupil dot joined to the white skin by a short bridge and the teeth attached to the upper white skin. The design is centered with a wide white margin, sized to wrap onto a medium pumpkin about 6 inches wide and 8 inches tall. Pure solid black and pure white only, no gray, no gradients, no shading, crisp clean vector-like edges, every white area connected to the outer white border by bridges at least as thick as a pencil, no floating white islands, no text, no watermark, no logos.
8. Silly Cyclops With a Gap Tooth
A one-eyed face with a goofy gap-toothed smile is the right choice for younger kids, since the large eye is a single easy cut. Generate at 3:4.
A black and white pumpkin carving stencil template printed on a plain white vertical page, showing a cheerful one-eyed jack-o'-lantern face with one huge round eye with a white pupil bridge across it, two small nostril dots and a wide curved smile with exactly one square tooth in the center and one tiny tooth to the right, all face shapes as black cut-out areas, Solid black shapes mark the parts that will be cut out and white marks the pumpkin skin that stays, with the pupil bridge running from the eye's rim across to the other side so it stays attached. The design is centered with a wide white margin, sized to wrap onto a medium pumpkin about 6 inches wide and 8 inches tall. Pure solid black and pure white only, no gray, no gradients, no shading, crisp clean vector-like edges, every white area connected to the outer white border by bridges at least as thick as a pencil, no floating white islands, no text, no watermark, no logos.
3) Intricate Etched and Shaded Stencils
These designs use the three-tone system and take longer, usually one to two hours, because shaving is slow. Start with the owl if you have never etched before, and use a loop tool or a linoleum cutter for the gray areas. If you like detailed linework, the tattoo artist content prompts show how bold line art can be described to an image model.
9. Owl on a Branch Under a Full Moon
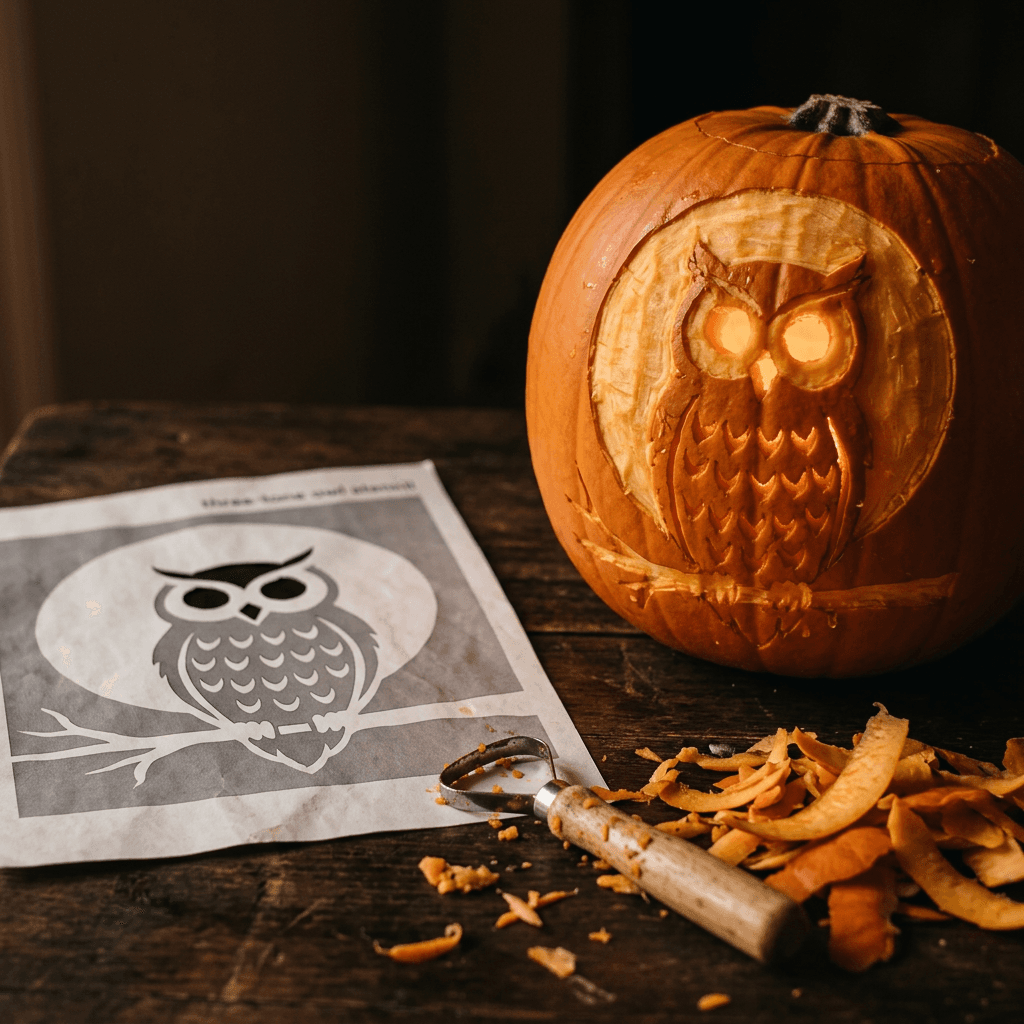
Etched designs use three tones. Full black is cut all the way through, mid gray is where you shave off only the orange skin so it glows softly, and white is untouched skin. This owl is a good first etched design. Generate at 3:4.
A three-tone pumpkin carving stencil template printed on a plain white vertical page, showing a detailed owl perched on a bare branch in front of a large full moon, with solid black for the cut-through areas (the owl's eyes, the beak gap and the crescent edge of the moon), a flat medium gray for the areas to be shaved thin (the owl's feather texture in short scale-like rows, the moon disc and the shadowed side of the branch) and plain white for the untouched skin around the owl and branch. The gray tone is one flat value with no gradients, the feather rows are separated by white lines at least a tenth of an inch wide at full size, and the design is centered with a wide white margin, sized to wrap onto a medium pumpkin about 6 inches wide and 8 inches tall. Crisp clean edges, no text, no watermark, no logos.
10. Howling Wolf and Pine Forest
The jagged pine line and the wolf's thick ruff are natural bridges, and shading the moon in gray lets it glow without cutting a big hole. Generate at 3:4.
A three-tone pumpkin carving stencil template printed on a plain white vertical page, showing a wolf in profile on a rocky ledge howling at a large full moon with a row of pine trees along the bottom, using solid black for the cut-through areas (the wolf's eye, the pine trees and the stars), a flat medium gray for the areas to be shaved thin (the moon disc and the wolf's fur in short strokes) and plain white for the untouched sky. The gray is one flat tone with no gradients, strokes of fur are separated by white lines at least a tenth of an inch wide at full size, and every black shape stays connected to the white border through the white sky. The design is centered with a wide white margin for a medium pumpkin about 6 inches wide and 8 inches tall. Crisp clean edges, no text, no watermark, no logos.
11. Haunted House on a Hill
A tall house with glowing windows is a classic etch-and-cut combination: the windows are cut through, the walls are shaved, and the sky stays untouched. Generate at 3:4.
A three-tone pumpkin carving stencil template printed on a plain white vertical page, showing a crooked Victorian haunted house with a pointed tower on a small hill, a crescent moon beside the tower and three bats above, using solid black for the cut-through areas (the lit windows, the front door and the bats), a flat medium gray for the areas to be shaved thin (the house walls, the roof and the hill) and plain white for the untouched sky. The gray is one flat tone with no gradients, each window is separated from the next by white wall space at least a quarter inch wide at full size, and the design is centered with a wide white margin for a medium pumpkin about 6 inches wide and 8 inches tall. Crisp clean edges, no text, no watermark, no logos.
12. Skull With Shaded Cheekbones
A skull looks great because the eye sockets and nose are cut through while the cheekbones and forehead are only shaved, which gives a convincing 3D effect. Generate at 3:4.
A three-tone pumpkin carving stencil template printed on a plain white vertical page, showing a front-facing human skull with two large eye sockets, a heart-shaped nasal opening and a row of upper teeth, using solid black for the cut-through areas (the eye sockets and nasal opening), a flat medium gray for the areas to be shaved thin (the shadowed hollows under the cheekbones, the temples and the gaps between the teeth) and plain white for the untouched bone surfaces. The gray is one flat tone with no gradients, the teeth are separate white shapes divided by narrow gray lines, and the design is centered with a wide white margin for a medium pumpkin about 6 inches wide and 8 inches tall. Crisp clean edges, no text, no watermark, no logos.
4) Original Fantasy, Space and Storybook Themes (No Trademarks)
Fans love character pumpkins, but prompts that name a specific film or game character can produce lookalikes you cannot post on a business account. Describing the features of an original creature gives you a design that is more distinctive and safe to share. The miniature diorama prompts are a good place to look if you want a storybook scene as a tiny-world photo as well.
13. Curled Fantasy Dragon
An original dragon curled around the pumpkin works for fantasy fans without borrowing any studio character. Describe features instead of naming one. Generate at 3:4.
A black and white pumpkin carving stencil template printed on a plain white vertical page, showing an original storybook dragon with a long curved neck, a small horned head in profile, folded wings with three finger-like ribs and a curling spiked tail, drawn as one bold black cut-out silhouette with a few white scale lines inside the body, Solid black shapes mark the parts that will be cut out and white marks the pumpkin skin that stays, with the white scale lines and wing ribs acting as bridges, and a white strip separating the tail from the body wherever they come close. The design is centered with a wide white margin, sized to wrap onto a medium pumpkin about 6 inches wide and 8 inches tall. Pure solid black and pure white only, no gray, no gradients, no shading, crisp clean vector-like edges, every white area connected to the outer white border by bridges at least as thick as a pencil, no floating white islands, no text, no watermark, no logos.
14. Astronaut Helmet and Ringed Planet
A generic space explorer reads well in black and white because the visor is a big simple shape, and the ringed planet adds a second focal point. Generate at 3:4.
A black and white pumpkin carving stencil template printed on a plain white vertical page, showing the front of a round astronaut helmet with a large oval visor reflecting a small ringed planet, a few cut-out stars and a crescent moon around it, the visor and stars as black cut-out areas and the helmet as a thick white outline, Solid black shapes mark the parts that will be cut out and white marks the pumpkin skin that stays, with the planet's rings drawn as thin white bridges across the black circle so the planet itself stays attached. The design is centered with a wide white margin, sized to wrap onto a medium pumpkin about 6 inches wide and 8 inches tall. Pure solid black and pure white only, no gray, no gradients, no shading, crisp clean vector-like edges, every white area connected to the outer white border by bridges at least as thick as a pencil, no floating white islands, no text, no watermark, no logos.
15. Pirate Ship With a Skull Flag
A sailing ship in profile fills a pumpkin's width nicely, and rigging lines are ideal bridges as long as they stay thick. Generate at 3:4.
A black and white pumpkin carving stencil template printed on a plain white vertical page, showing an old three-mast pirate ship in profile with billowing square sails, a skull flag at the top, a curved hull and stylized waves along the bottom, the sails, flag shapes and waves as black cut-out areas separated by thick white rigging lines, Solid black shapes mark the parts that will be cut out and white marks the pumpkin skin that stays, with the masts and ropes drawn as white lines at least a quarter inch thick at full size and the skull's eyes and nose as small black cut-outs inside the flag. The design is centered with a wide white margin, sized to wrap onto a medium pumpkin about 6 inches wide and 8 inches tall. Pure solid black and pure white only, no gray, no gradients, no shading, crisp clean vector-like edges, every white area connected to the outer white border by bridges at least as thick as a pencil, no floating white islands, no text, no watermark, no logos.
16. Witch's Cottage With Mushrooms
A storybook cottage with a crooked chimney and a ring of toadstools brings a cozier, cottagecore take on Halloween. Generate at 3:4.
A black and white pumpkin carving stencil template printed on a plain white vertical page, showing a small crooked witch's cottage with a round door, two lit windows, a curling chimney with smoke and a ring of five spotted mushrooms in front, with the windows, door, smoke and mushroom spots as black cut-out areas and the walls and roof as white, Solid black shapes mark the parts that will be cut out and white marks the pumpkin skin that stays, with the window frames and mushroom stems wide enough to stay strong and the smoke drawn as one thick curling ribbon attached to the chimney. The design is centered with a wide white margin, sized to wrap onto a medium pumpkin about 6 inches wide and 8 inches tall. Pure solid black and pure white only, no gray, no gradients, no shading, crisp clean vector-like edges, every white area connected to the outer white border by bridges at least as thick as a pencil, no floating white islands, no text, no watermark, no logos.
5) Pet and Family Silhouette Stencils
Personal pumpkins are the ones people photograph and share. A silhouette is the most forgiving format for a pet, because the outline carries the likeness. For a Halloween costume photo of the same pet afterward, see the AI pet Halloween costume prompts, and for family portraits the AI family look-alike prompts.
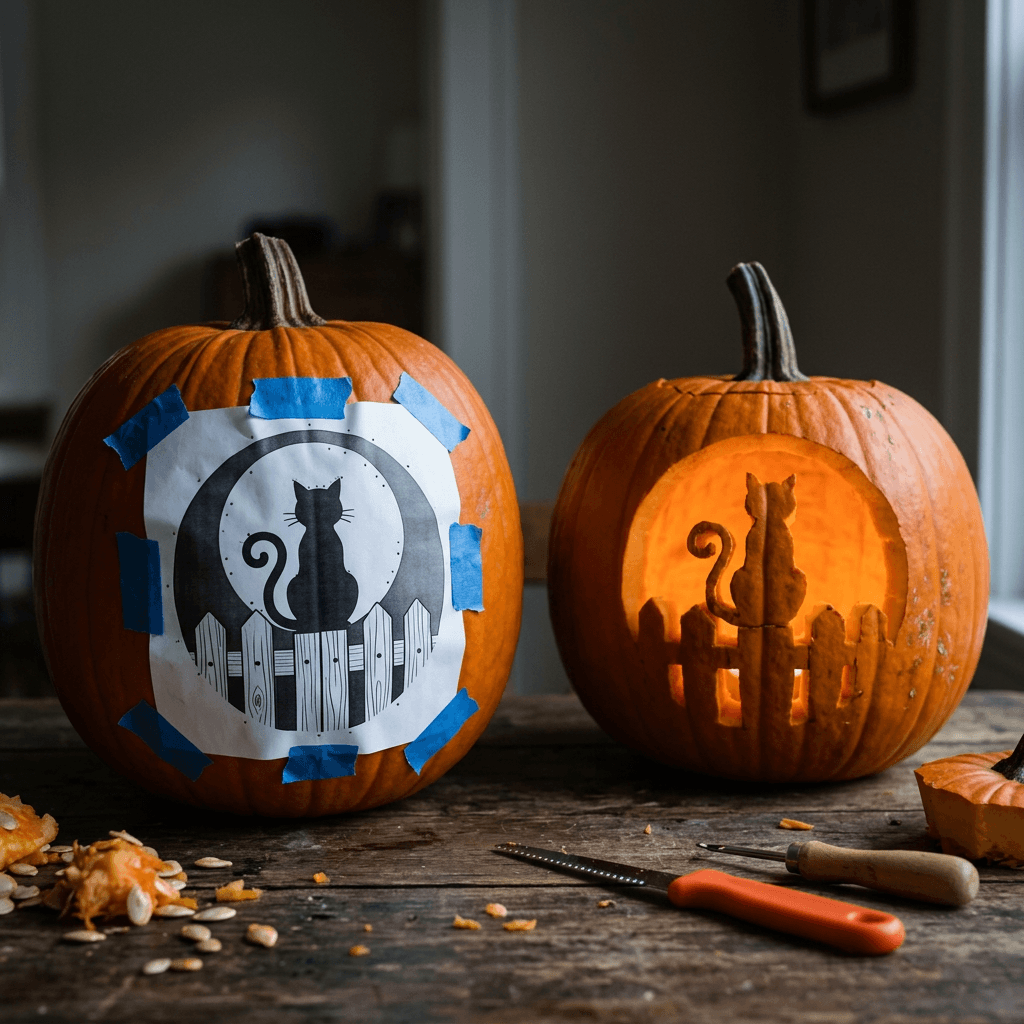
17. Cat Sitting on a Fence Silhouette
A pet silhouette is the most personal carving you can make, and a side view of a sitting cat with an arched tail is the simplest pose. Generate at 3:4.
A black and white pumpkin carving stencil template printed on a plain white vertical page, showing a side-view silhouette of a sitting cat with pointed ears and a long curled tail resting on a wooden fence, with a large full moon behind it, the cat, fence and a few cut-out stars as black shapes and the moon as a thick white ring outline, Solid black shapes mark the parts that will be cut out and white marks the pumpkin skin that stays, with the fence boards separated by white gaps at least a quarter inch wide and the moon's ring broken by two small black bridges. The design is centered with a wide white margin, sized to wrap onto a medium pumpkin about 6 inches wide and 8 inches tall. Pure solid black and pure white only, no gray, no gradients, no shading, crisp clean vector-like edges, every white area connected to the outer white border by bridges at least as thick as a pencil, no floating white islands, no text, no watermark, no logos.
18. Dog Portrait From Your Own Photo
In image-to-image mode you can upload a clear side-profile photo of your dog and ask for a simplified stencil of that exact dog. Use a photo with the head turned and good contrast against the background. Generate at 3:4.
Turn the uploaded photo of my dog into a black and white pumpkin carving stencil template on a plain white vertical page, keeping the dog's real ear shape, snout and markings recognizable as a simplified side-profile silhouette. Solid black shapes are cut-out areas (the dog's body and head filled in), and white lines inside the shape mark the eye, the ear edge and the collar so they stay as bridges, with the whole dog attached to the outer white border by the collar and a thick white tuft of fur. Pure black and pure white only, no gray, no gradients, no shading, every white area connected to the outer border, no floating white islands, centered with a wide white margin, sized to wrap onto a medium pumpkin about 6 inches wide and 8 inches tall, no text, no watermark, no logos.
19. Family Initial With Vine Bridges
One big monogram letter framed by vines is a neat porch decoration, and a letter is short enough that image models usually draw it correctly. Replace [LETTER] with your own initial and check it carefully. Generate at 3:4.
A black and white pumpkin carving stencil template printed on a plain white vertical page, showing one bold capital letter [LETTER] in a thick serif style as a solid black cut-out shape, surrounded by a wreath of curling vines, five leaves and three small stars as black cut-out shapes, with a white inner outline running along the letter's edge and several thick white bridges joining the letter's counters to the outer white border. Solid black shapes mark the cut-out areas and white marks the pumpkin skin that stays, the design is centered with a wide white margin and sized for a medium pumpkin about 6 inches wide and 8 inches tall, pure black and pure white only, no gray, no gradients, no floating white islands, no extra letters or words, no watermark, no logos.
6) Photoreal Finished Pumpkin Inspiration Images
These prompts generate photos of finished carved pumpkins rather than stencils. Use them to preview a design, as a Pinterest-style mood board, as a blog or newsletter header, or as a background for a thumbnail. To get believable skin texture and lighting, the guide to making AI images look like real photos has the lens and lighting tricks that make a pumpkin look photographed instead of rendered.
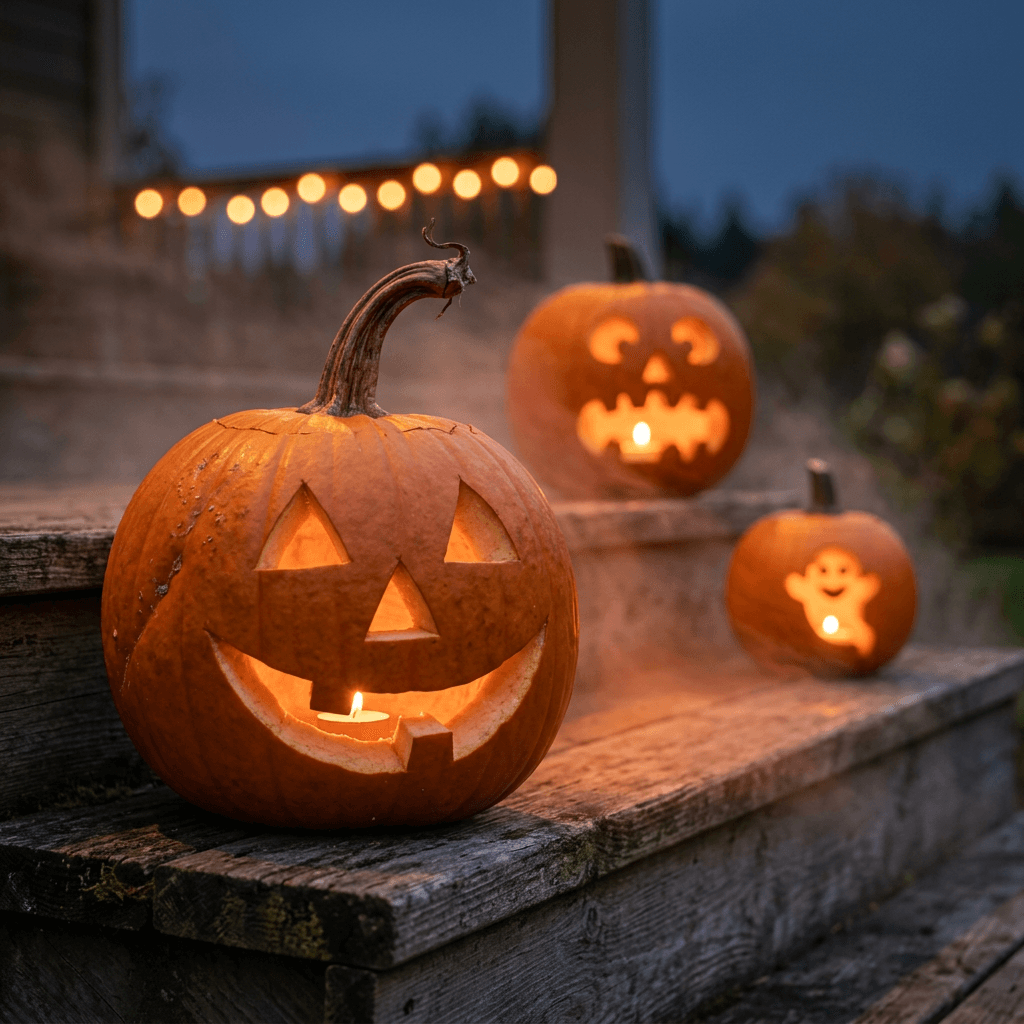
20. Row of Glowing Jack-o'-Lanterns on a Porch
Use this for Pinterest-style inspiration or a hero image for your own post, and change the faces to try out ideas before you carve anything. Generate at 16:9.
A photorealistic evening photograph of three carved pumpkins of different sizes lined up on weathered wooden porch steps, each glowing warm orange from a flickering candle inside, the largest with a classic triangle-eyed grin, the middle one with a toothy surprised face and the smallest with a simple smiling ghost, thin curls of mist drifting across the steps, a dark navy blue dusk sky and a blurred string of warm porch lights in the background. Shot at eye level with a 50mm lens at f/2.8 so the nearest pumpkin is sharp, natural orange pumpkin skin texture with slight blemishes, ribbing and a brown curled stem, cut edges showing pale flesh, glow spilling softly onto the wood. No blurry or distorted details, no extra faces, no text, no watermark, no logos.
21. Intricate Owl Pumpkin Glowing in the Dark
This is the finished-carving version of the etched owl stencil, handy for showing viewers what the shaded levels look like once lit. Generate at 4:3.
A photorealistic close-up of a single large orange pumpkin carved with a detailed owl perched on a branch in front of a full moon, lit from inside by a steady LED candle in a dark room, the owl's eyes cut through and glowing bright yellow-white, its feathers etched in shallow rows that glow a softer amber, the moon disc a mid-orange glow and the untouched skin dark and matte. Dark background with a faint blue rim light on one side of the pumpkin, macro-style shot at f/4 with the owl's face in sharp focus, visible skin texture and fine peeled-edge detail around the shaded areas. No blurry or distorted details, no text, no watermark, no logos.
22. White Pumpkin Ghost on a Farmhouse Table
Smooth white pumpkins are a favorite for etched designs and modern decor, so this prompt gives the soft daylight look rather than the glowing-in-the-dark look. Generate at 1:1.
A photorealistic daylight photograph of a smooth white pumpkin on a rustic farmhouse table with a simple ghost carved into the front, two oval eyes and a round mouth cut through, tucked between a bunch of eucalyptus stems, two small orange gourds and a linen napkin, with an unlit candle inside barely visible through the carved holes. Soft overcast window light from the left, shallow depth of field with the pumpkin sharp, pale ivory skin with a faint chalky bloom and subtle ribbing, neutral warm tones. No blurry or distorted details, no text, no watermark, no logos.
23. Pumpkin Carving Reveal Thumbnail
A close dramatic shot with high contrast works as a Shorts cover or a YouTube thumbnail background, leaving room on one side for a short headline you add yourself. Generate at 16:9.
A photorealistic dramatic close-up of a large carved pumpkin on the right side of the frame with a fierce grinning face glowing intensely orange from inside, thick orange-red light spilling onto the surrounding dark surface and a plume of white fog rolling off the table, with the left third of the frame left as dark empty shadow for a headline. Low camera angle with a 35mm lens at f/2.8, deep black shadows, rich saturated orange highlights, glossy wet pumpkin pulp strands at the cut edges, the carving sharp and fully in focus. No blurry or distorted details, no text, no watermark, no logos.
7) Video and Shorts Prompts for Pumpkin Content
Carving videos do well in October because the before and after is satisfying. These two prompts cover a how-to Short made with Text2Shorts and a slow cinematic clip of a glowing pumpkin. For more ideas, the Halloween video prompts for Shorts and TikTok have twenty more.
24. Carving Time-Lapse Short With Text2Shorts
Enter this as a topic in Text2Shorts, pick a realistic or animation style, then edit the script and scene prompts so the steps match your own carving. Check every step it writes before generating.
A 30-second vertical video that shows how to carve an easy pumpkin step by step, starting with a pumpkin on a newspaper-covered table, then scooping out the seeds, taping a printed stencil to the front, poking holes along the lines with a pin tool, cutting along the dotted outline with a small saw, and finally lighting it in a dark room, with an upbeat, encouraging voiceover and one practical tip per step.
25. Cinematic Glowing Pumpkin Close-Up
Use text-to-video or image-to-video in the cinematic generator, and start from the porch or reveal image above for the best consistency. Keep the movement slow and generate in 9:16 for Shorts.
A slow cinematic push-in on a carved pumpkin with a toothy grin on a dark wooden porch at night, its inner candle flame flickering and casting shifting warm orange light across the cut edges, thin fog rolling gently across the floor, a few dry leaves drifting through the frame and distant blurred porch lights glowing in the background, the pumpkin's face staying stable and unchanged, shallow depth of field, smooth natural motion, no flashing, no text, no logos, no distortion.
How to Customize These Pumpkin Carving Prompts
Change the size to fit your pumpkin. Every stencil prompt says "a medium pumpkin about 6 inches wide and 8 inches tall". Swap that line for the width of your own pumpkin's front, and when you print, scale the page until the design fits with a bit of paper to spare on each side.
Ask for fewer details. If a generated stencil looks too complicated, add "simplify to five large shapes with very thick bridges" to the prompt and regenerate. A simpler stencil almost always carves better than a detailed one, and fewer details also mean fewer chances for the saw to slip.
Fix islands with a marker. Print the stencil and look at every white shape. If a white piece is fully surrounded by black, draw a thick bridge from it to the border by hand before transferring. This takes one minute and saves the whole carving.
Mirror and invert on purpose. Black on white is the standard layout, but if your printer or tracing method turns it around, ask for the inverse (white cut-outs on black) and check which tone you are cutting before you start.
Use image-to-image for your own subjects. In the image-to-image mode of the AI Image Generator, upload a photo of your pet, a child's drawing or a company mascot and ask for a simplified stencil of that exact subject. A child's drawing becomes a surprisingly good carving once the bridges are added.
Fix a bad area instead of starting over. If a stencil is almost right except for one messy area, the inpainting guide shows how to mask just that part and regenerate it.
Keep a consistent style across a set. Carvers who build a display of three or five pumpkins get the best look by keeping the same tone and shape language. The guide to consistent characters and scenes across multiple images explains how to keep a series matching, and the fall aesthetic photo prompts have porch and table settings that suit a finished display.
Make it a phone background afterward. A photo of your finished jack-o'-lantern can be turned into a lock screen with the Halloween wallpaper prompts.
Common Mistakes With AI Pumpkin Stencils and Carving
Using a photo as a stencil. A realistic photo of a carved pumpkin is a reference and not a pattern. It has no bridges, no cut lines and no difference between skin and hole, so it cannot be printed and traced. Generate a flat black and white stencil for carving.
Skipping the bridge sentence. Without it, models draw beautiful floating shapes. Always include the line about connecting every white area to the border.
Letting the model draw text. Words on pumpkins are hard to carve and AI often misspells them. If you need a name, generate the artwork without text and add the letters as a separate cut-out in an editor, or keep to a single initial like prompt 19.
Asking for gradients. Smooth shading cannot be carved. Use flat tones and ask for exactly three values.
Printing too small or too large. If the stencil is smaller than the pumpkin's front, the design looks lost, and if it is wider than the front, the paper wrinkles and the lines stretch. Measure the pumpkin first.
Cutting the big shapes first. Removing a large area early weakens the wall, so the thin parts crack while you work. Start with the smallest details.
Carving too early. A pumpkin carved a week ahead can sag, shrivel or grow mold, especially if the weather is warm. Plan to carve on October 27 through 29 for a Halloween 2026 display.
Using a naked flame in a thin-walled pumpkin. Heat dries and darkens the inside quickly, and the lid can scorch. LED lights are cooler, safer around kids and pets, and last for the whole night.
Naming trademarked characters in prompts. Describe an original creature or scene instead, so you are free to post, sell or share your design.
Forgetting to proof the stencil. Look at it at full size before taping it down, and check that the bridges, the pumpkin proportions and the orientation all match your plan.
Make Your Pumpkin Carving Kit With Miraflow
The whole process fits in one browser session. Open the AI Image Generator on Miraflow, choose 3:4, paste a stencil prompt and generate four or five versions, because models vary a lot from run to run and the best bridges are rarely in the first picture. Pick the one with the thickest, clearest bridges and print it at your measured size.
When your pumpkin is done, take a photo, upload it with the image-to-image option and ask for a moodier, glowing night version for your feed. Use Text2Shorts to build a short carving tutorial from the topic prompt in section 7, or the cinematic video generator to animate your jack-o'-lantern, then add a spooky instrumental track from the AI Music Generator. If you record a long carving video, AI Clipping can find the best moments and make captioned vertical clips from it.
To get people to click on your pumpkin video, build the cover with the YouTube Thumbnail Maker and see the Halloween thumbnail prompts for layouts, and the Shorts beginner guide for tips on getting a first video noticed. You can reach every tool from the Miraflow home page.
If you want a costume to go with the pumpkin, the Ghostface and costume portrait prompts are a good next step.
Frequently Asked Questions
Can AI make a pumpkin carving stencil I can actually carve?
Yes, as long as you ask for the right thing. Request pure black and white shapes, say that black is cut out and white stays, ask for thick bridges and no floating white islands, and check the result for islands before you print. Models do not understand the physical limits of a pumpkin, so a quick look at every white shape is still necessary.
What size should I print a pumpkin stencil?
For a medium pumpkin with a front about 8 to 10 inches wide, a design about 6 inches wide and 8 inches tall works well on a standard letter or A4 sheet. Small pumpkins need roughly 4 by 5 inches, and large ones can take 8 by 10 inches or more. Measure the flat part of the front and leave a little pumpkin skin all around the design.
What are bridges and islands in pumpkin carving?
An island is a piece of skin completely surrounded by cut-out space, such as the center of a letter O, and it will fall out when you cut. A bridge is a strip of skin that connects the island to the rest of the pumpkin and holds it in place. About a quarter inch thick is a good minimum for bridges on a medium pumpkin.
What is the difference between etching and cutting through?
Cutting through removes the wall completely, which lets the most light out. Etching, also called shaving or peeling, removes just the orange skin and some flesh, leaving a thin layer that glows softly. Combining both gives you black, gray and white tones in the finished pumpkin.
What is the best pumpkin for detailed carving?
Choose a pumpkin that sits flat, has a firm stem, no soft spots and a smooth wide front. Classic carving varieties such as Howden have thick walls for cut-through work, while smooth white pumpkins show etched designs with strong contrast. Very bumpy pumpkins suit simple faces better than detailed scenes.
How do I transfer a stencil to a pumpkin?
Tape the printed stencil onto the front with painter's tape, make small relief cuts in the paper where it wrinkles, and poke holes along the lines about an eighth of an inch apart with a pin tool or a thick needle. Remove the paper and follow the dotted outline. You can also rub graphite on the back of the stencil and trace over the lines to leave a faint pencil outline.
How long do carved pumpkins last?
In mild weather a carved pumpkin usually looks good for about three to five days. Warmth and sun shorten that, and a cool place helps. Carving on October 27 to 29 gives you a fresh pumpkin for Halloween night on Saturday, October 31, 2026. Rubbing the cut edges with petroleum jelly slows drying.
What is the safest light to use in a jack-o'-lantern?
LED candles or battery tea lights are the safest choice because they do not heat the pumpkin or create a fire risk, and they last for hours. If you do use a real candle, use a short votive in a glass holder, cut a vent in the lid, and never leave it unattended.
Can I sell or post stencils I make with AI?
You can generally post photos of your own pumpkins. If you plan to sell stencil files, read the terms of the tool you use and avoid prompts that name trademarked characters or logos. Describing an original creature or scene is the safest option.
Can I use AI to preview a design before I carve it?
Yes. Use the photoreal prompts in section 6 to generate a finished-pumpkin image of the design you are considering, compare a few faces, and then generate the black and white stencil for the one you like best.
Conclusion
A pumpkin stencil works when every piece of skin you want to keep stays attached, and an AI image generator will respect that rule only if you tell it to. Ask for pure black and white, say which color is cut out, demand thick bridges and no islands, and for shaded designs use exactly three flat tones. That small set of instructions turns an image model into a surprisingly practical stencil designer.
The 25 prompts above cover easy beginner stencils, classic faces, etched and shaded designs, original fantasy themes, pet and family silhouettes, photoreal finished-pumpkin inspiration and two video prompts. Combine them with a pumpkin that suits the design, a proper transfer, the right tools, a cut order that starts with the details and an LED light, and you will have a display that survives until Halloween night on October 31.
Open the AI Image Generator on Miraflow, pick a stencil, print it at the size of your own pumpkin and start carving this week.